
The Trade Desk is a robust platform that empowers advertisers to effectively set up, manage, and optimize advertising campaigns. Leveraging programmatic technology, it offers access to a wide array of ad inventory from renowned exchanges and publishers, including Spotify, The New York Times, and ESPN.
The platform’s advanced features — such as contextual, geographical, and cross-device targeting — facilitate cross-channel advertising, data management, and integrations. But why settle for just using The Trade Desk when you can master it? By learning The Trade Desk best practices, you can achieve better campaign results.
Below are four essential techniques that will transform your advertising strategy with The Trade Desk.
1. Add Rails to Campaigns
Rails are the parameters or rules you set for ad delivery under your campaigns. The Trade Desk has default rails, but in most cases, these are too broad, such as unlimited frequency. Using this default setting would mean serving the same ads to the same users too many times, resulting in ad fatigue.
Therefore, you’ll need to add minimum rails for a campaign by clicking “Add Rail” and selecting from the various rails available in The Trade Desk.
Here are some of the most crucial rails to set up.
Specify the Ad Environment
With this rail, you can specify which devices you want to deliver your ad to. One consideration here is not to include “In-App” by default since it may deliver to lots of mobile games, which may or may not align with your campaign’s relevance. Therefore, you would only include “In-App” when you have a very specific use case.
When specifying the ad environment:
- Set the device type you want for your campaign. This confirms with The Trade Desk where the content can be delivered. Options include mobile, PC, tablet, digital out-of-home, other, and TV.
- Uncheck “Other” to ensure guaranteed delivery exclusively on mobile, PC, and tablet for a display campaign. For a CTV campaign, make sure to only select TV.
Add Brand Safety Rails
Every campaign should have brand safety rails. These rails act as your campaign’s shield, protecting brand reputation, preventing ad misplacement, and maintaining a positive user experience.
The following are the brand safety rails you need to add to your campaigns:
Display Ad Fraud Prevention
This rail blocks sites that IAS knows have a high level of ad fraud and bot traffic. When the “Display Ad Fraud Prevention” rail is activated, The Trade Desk checks the destination URL of each ad impression against the IAS database. If the URL matches a known fraudulent site, the ad impression is blocked, preventing your budget from being wasted on bots or invalid traffic.
The rail offers two levels of protection: moderate risk and high risk. The moderate risk setting blocks sites with a medium level of suspected ad fraud, while the high-risk setting blocks sites with a high level of suspected fraud. The choice of setting depends on your risk tolerance and your desired level of protection against ad fraud.
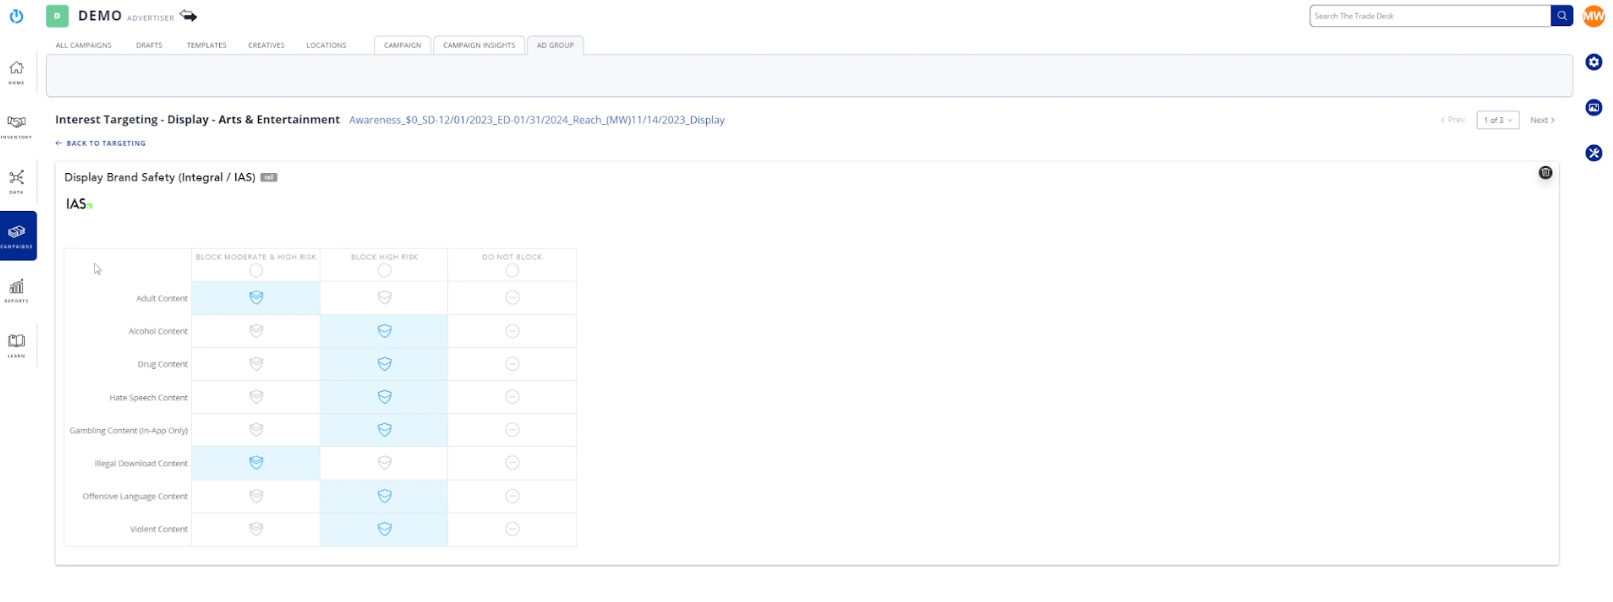
Display Brand Safety
The “Display Brand Safety” rail allows you to control where your ads appear and prevent them from being displayed alongside inappropriate or offensive content, such as adult content, alcohol, hate speech, offensive language, illegal downloads, illegal drugs, and violence.
Each content category has two risk levels: moderate & high risk and high risk. Moderate & high risk blocks content considered mildly inappropriate, while high risk blocks content that is deemed more offensive or harmful. The rail defaults all content to high risk, but you can change this depending on your advertiser or content.
Display Viewability
Viewability refers to the percentage of an ad impression that the user actually sees — while an impression might be recorded, if the ad is not seen, it has limited impact. For display ads, viewability is typically measured as the percentage of the ad that is in view for at least one second.
The Trade Desk’s “Display Viewability” rail allows you to specify the minimum viewability threshold you want for your ads. You can set it to 70%, 60%, 50%, 40%. For example, 70% means steering delivery towards websites where your ad will be in view 70% of the time, for at least one second.
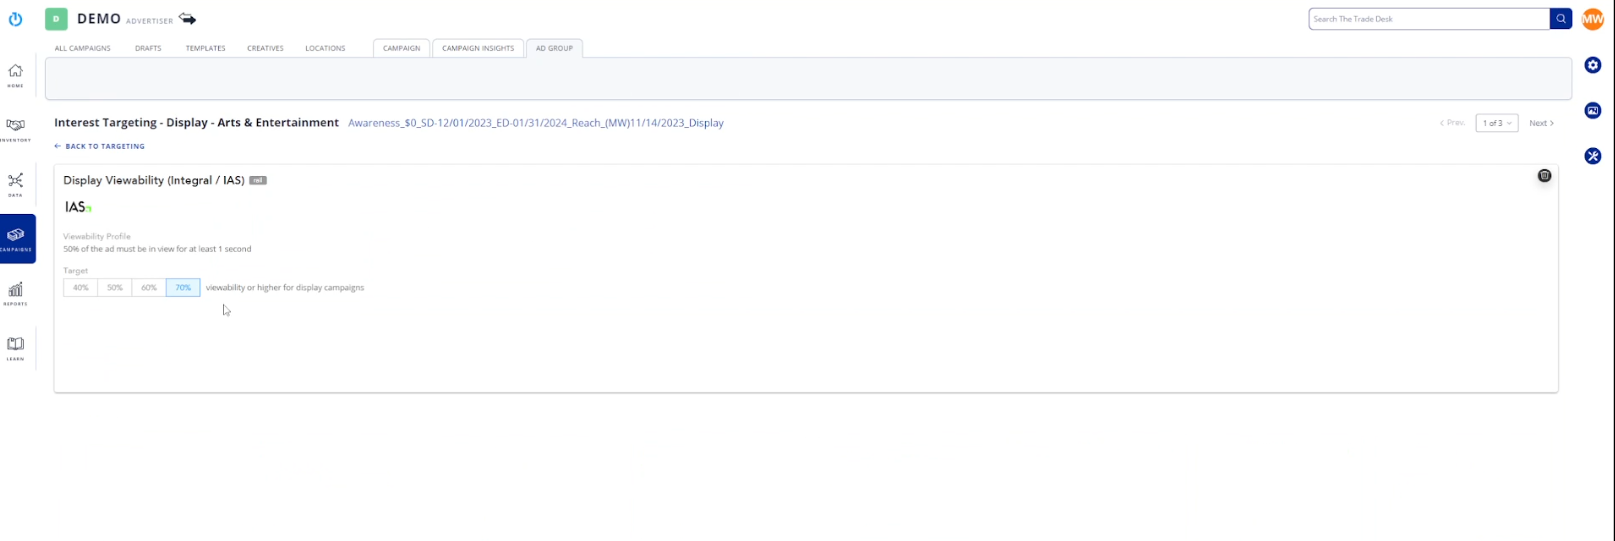
By setting a viewability goal, you can prioritize ad placements on websites where your ads are more likely to be seen, ensuring that your ad spend is used effectively.
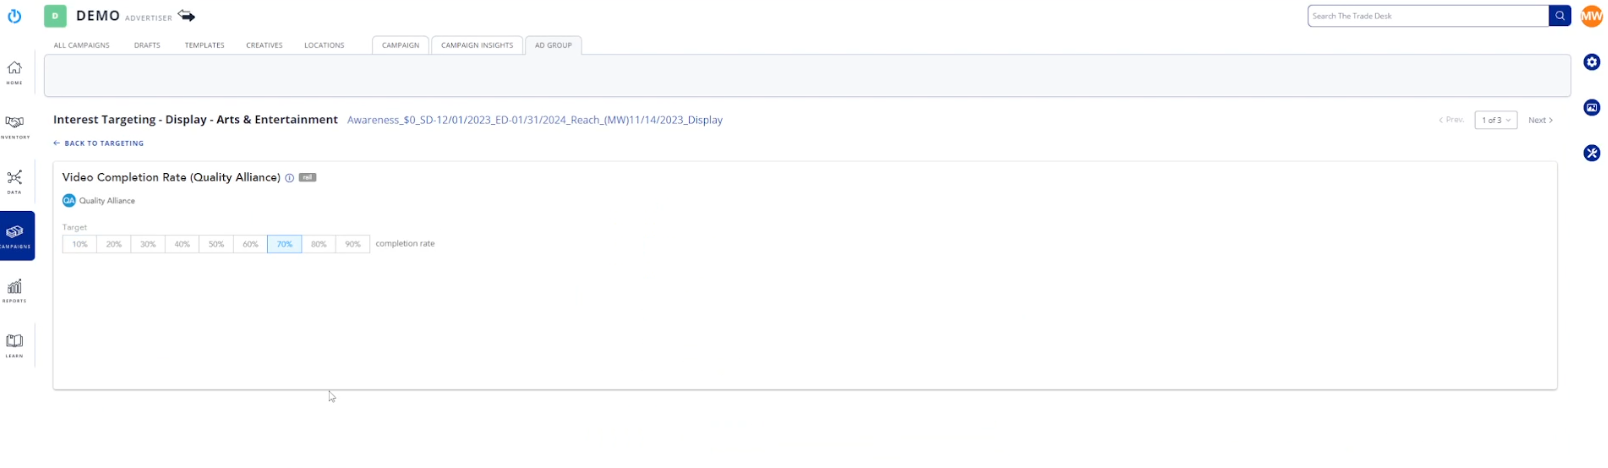
Viewability is less of a concern for video ads as the video itself is the focus of attention. Instead, you should prioritize video completion rates, which measure the percentage of viewers who watch a certain percentage of the video.
The Trade Desk’s “Video Completion Rate” rail allows you to set a completion goal, ensuring that your ads reach viewers who are genuinely interested in the content. This metric provides a more accurate representation of ad engagement and campaign effectiveness.
Add “Site/App” Exclusion
Without the “Site/App” exclusion rail, you can deliver your ads on any website your audience is going to, even those that don’t align with your advertiser’s preferences. As such, it’s important to use this rail to exclude low-performing sites.
When you select “Add Site/App List,” you can access exclusion lists curated by The Trade Desk, including the “Exclusion List – TTD managed.” This global list includes websites and apps that are known to exhibit low quality, inappropriate content, or fraudulent activity, and it can be used for any geographical location you add it to.
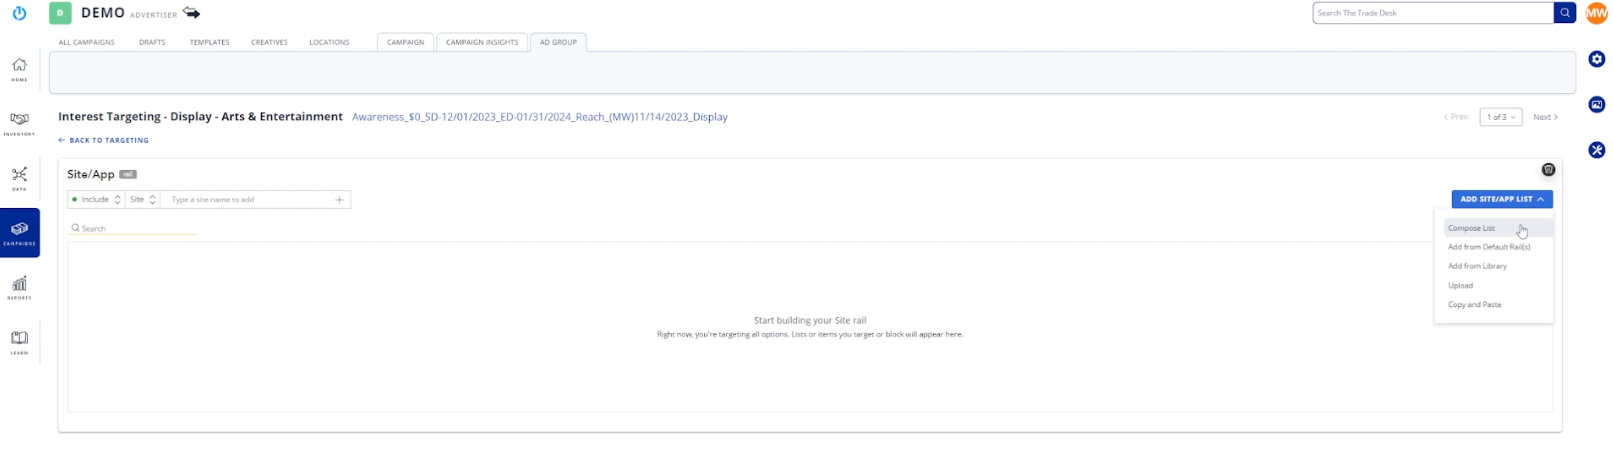
However, for more granular control, you should craft your own exclusion list, which pinpoints specific websites or apps you want to avoid, including those categorized as low-performing.
Note: While you’ll apply these rails to most ad groups, there’s an exception when targeting specific private marketplaces (PMPs). PMPs are inherently curated and considered brand safe. Placing additional rails on top of your PMP may adversely affect delivery, potentially hindering the efficient delivery of impressions to your PMP.
2. Refine Your Audience To Exclude People Who Have Already Purchased Your Product
Broad targeting can capture a large pool of potential customers. Still, it runs the risk of overexposing your ads to individuals who have already purchased your product or are not a good fit for your offerings.
One of the most effective strategies for avoiding overexposure and enhancing campaign performance is to exclude individuals who have already purchased your product. This approach is particularly beneficial for one-time purchases, preventing customers from seeing ads for a product they already own.
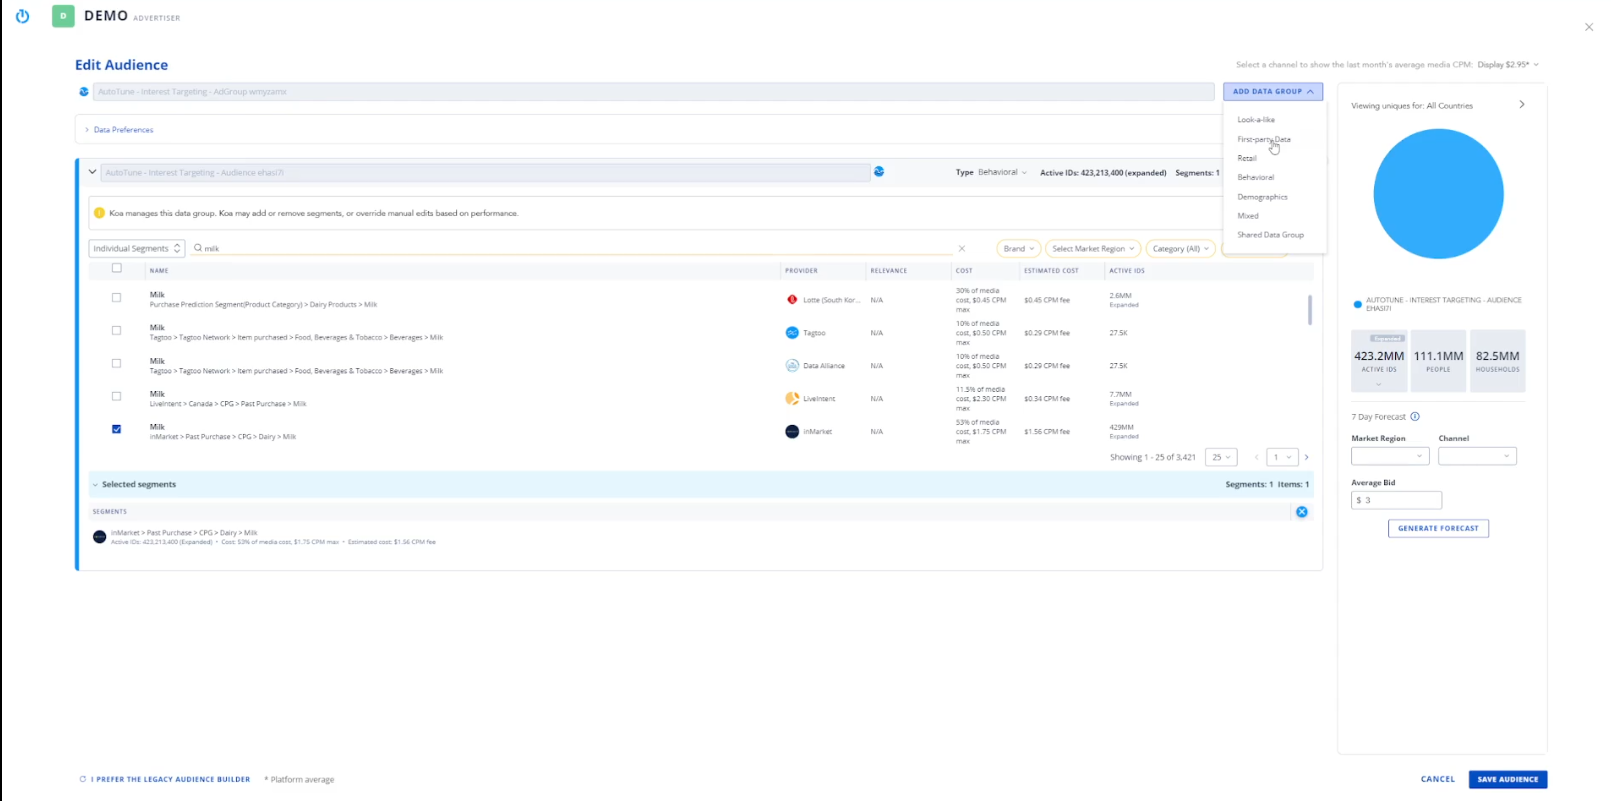
Consider this: You’re targeting jewelry buyers. To exclude people who have already purchased jewelry, you create a new ad group using an “and” statement. This involves combining your first-party data, which includes the product purchase pixel (i.e., people who have purchased the product), with the jewelry buyer audience.
By selecting your first-party data and choosing the product purchase pixel, you are essentially saying, “We want to target jewelry buyers but exclude those who have already bought our product, ” thus ensuring that your ads are directed toward potential customers who have not yet made a purchase.
You can also employ a recency retargeting strategy for products that people may purchase repeatedly, like beverages. This involves setting a time frame, such as 30 days, during which customers who have already purchased the product will not see your ads. After this period, they will be reintroduced into the targeting pool, allowing you to maintain top-of-mind awareness and encourage repeat purchases.
Note: Audience refinement extends beyond product purchases and can be applied to various aspects of user behavior. For instance, you can exclude individuals who have visited specific pages on your website or engaged with particular ad elements. Such targeting allows you to tailor your campaigns to specific user journeys and interests.
The more data you collect through pixels and other tracking mechanisms, the more refined your audience targeting can become, allowing you to create complex audience segments with multiple inclusions and exclusions. For example, you can target people who have clicked on banner A with banner B but exclude those who clicked on banner C. Such precision will ensure that your ads reach the most relevant individuals at each stage of their purchasing journey.
3. Use Flight Dates for Creatives in The Trade Desk
When managing multiple creatives with distinct running periods (versions A, B, C, D), marketers will typically specify start and end dates for each. However, instead of relying on memory or calendars to track when each creative will run, a more effective approach is to set flight dates in advance. This best practice streamlines the process, reducing the risk of errors. To use flight dates:
- Locate and enter the Creative Library within The Trade Desk platform.
- Identify the creatives (versions A, B, etc.) that need flight dates assigned.
- For each creative, select the option to edit flight dates — specify each creative version’s start and end dates based on the client’s instructions. For example, if creative A is to start immediately and end on a specific date, input those details accordingly.
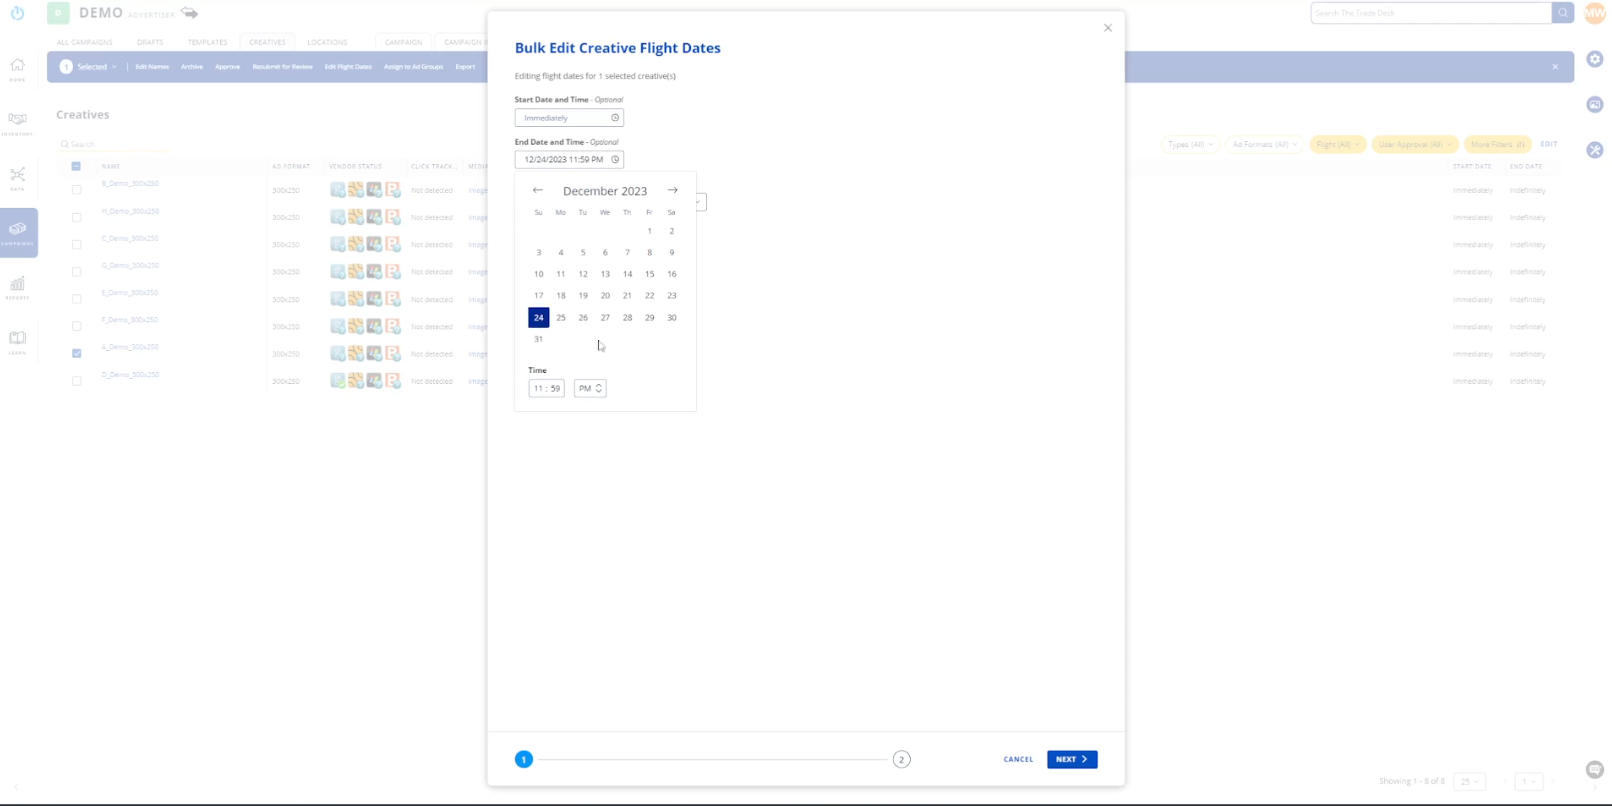
- Confirm and save the flight date changes for the selected creative.
- Repeat the process for all relevant creative versions provided by the client (B, C, etc.).
- Double-check the flight dates in the creative library to ensure accuracy and alignment with the client’s requirements.
Once you have set this up, you don’t have to go back to the Campaign view to apply the changes; you can do everything from the Creative Library. For instance, if you want creative A to run in a specific ad group, you can select and assign it to an ad group/s. This way, you’ll gain immediate visibility into all the ad groups the creative is assigned to.
Now, let’s have a look at a top tip before moving on to the fourth best practice for using The Trade Desk.
Top Tip: How to Simplify the Way You Read Reports
Scenario: Suppose you want to run a report to analyze how many product purchases a campaign has generated, focusing on conversion metrics associated with the pixel gathering product purchase information.
By default, The Trade Desk report will list all the different pixels, resulting in a jumble of conversions labeled as “01 – Click Conversion,” “02 – Click Conversion,” and so on.

Navigating through multiple reports and renaming each pixel becomes increasingly tedious as the number of pixels increases. Fortunately, The Trade Desk offers a workaround to simplify this process:
- Start by removing all the existing conversions.

- Click “Save As” and save the report. Upon reopening, you’ll find a new section labeled “Conversion Pixel Names.”
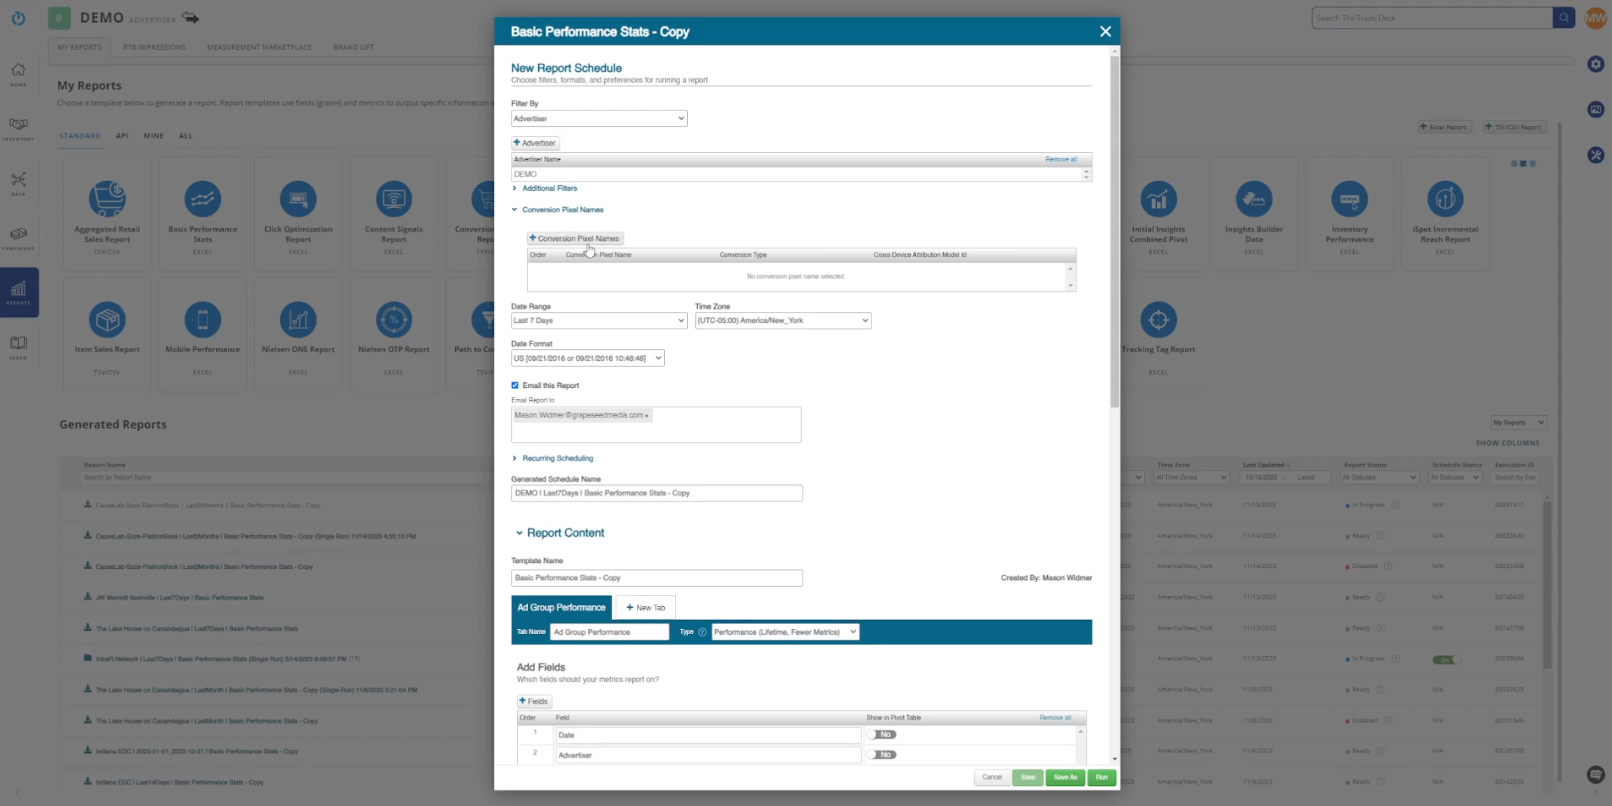
This allows you to select the pixels by the name built within the advertiser, eliminating the need to manually rename generic conversions like “01- Click Conversion,” etc. As a result, the report will display the specific pixel names rather than the default “01-Click Conversion” convention.
- Then, select conversion metrics. Instead of relying on the default report columns, scroll down and add your desired conversion metrics for each pixel, such as “Click Conversion” and “View-Through Conversion.”
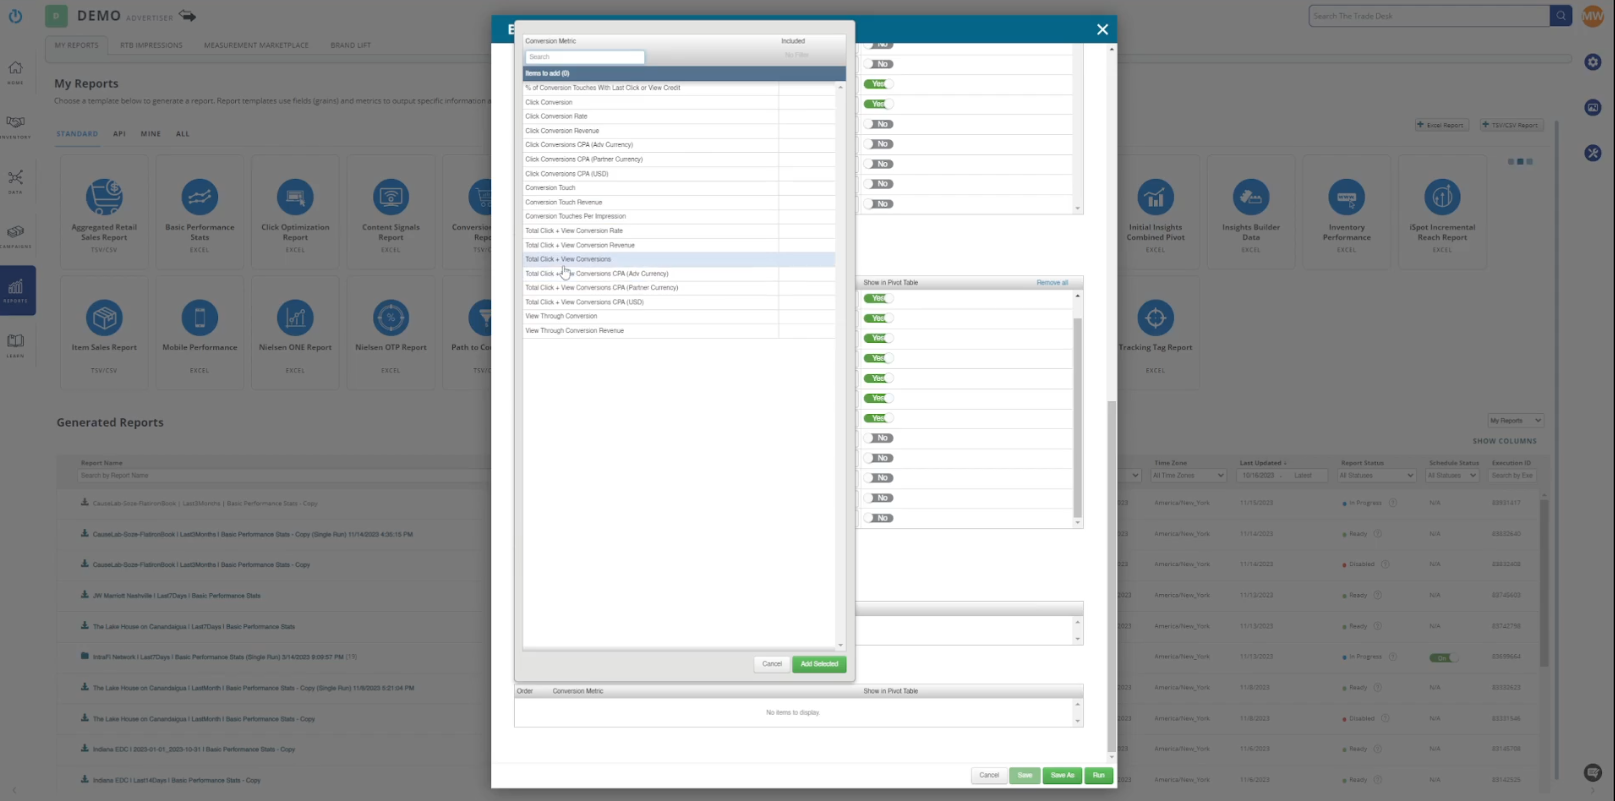
- Click “Run” to generate a clean, organized report with well-defined pixels and selected conversion metrics.
This method eliminates any messiness and ensures organized reports that are easier to analyze.
4. Have Good Optimization Habits
Optimization is a vital part of any campaign delivery process. But rather than manually generating a report each time you need insights into individual campaigns or receiving multiple reports through separate emails, a best practice is to consolidate key metrics into a single, recurring report. This streamlines the analysis process, allowing for regular check-ins — such as weekly — and fostering a proactive approach to campaign optimization.
The “Basic Performance Stats” report serves as an excellent foundation on which to build.
To set up your report, use the tip outlined above to see your conversions. This will set you up for success right from the start.
Then, set up tabs for the other metrics you want to track. Let’s say you also want to look at specific geographies or websites. Instead of creating the conversions report to be reoccurring, as well as the geo and inventory reports, simply create new tabs that will appear in the Excel sheet report you receive.
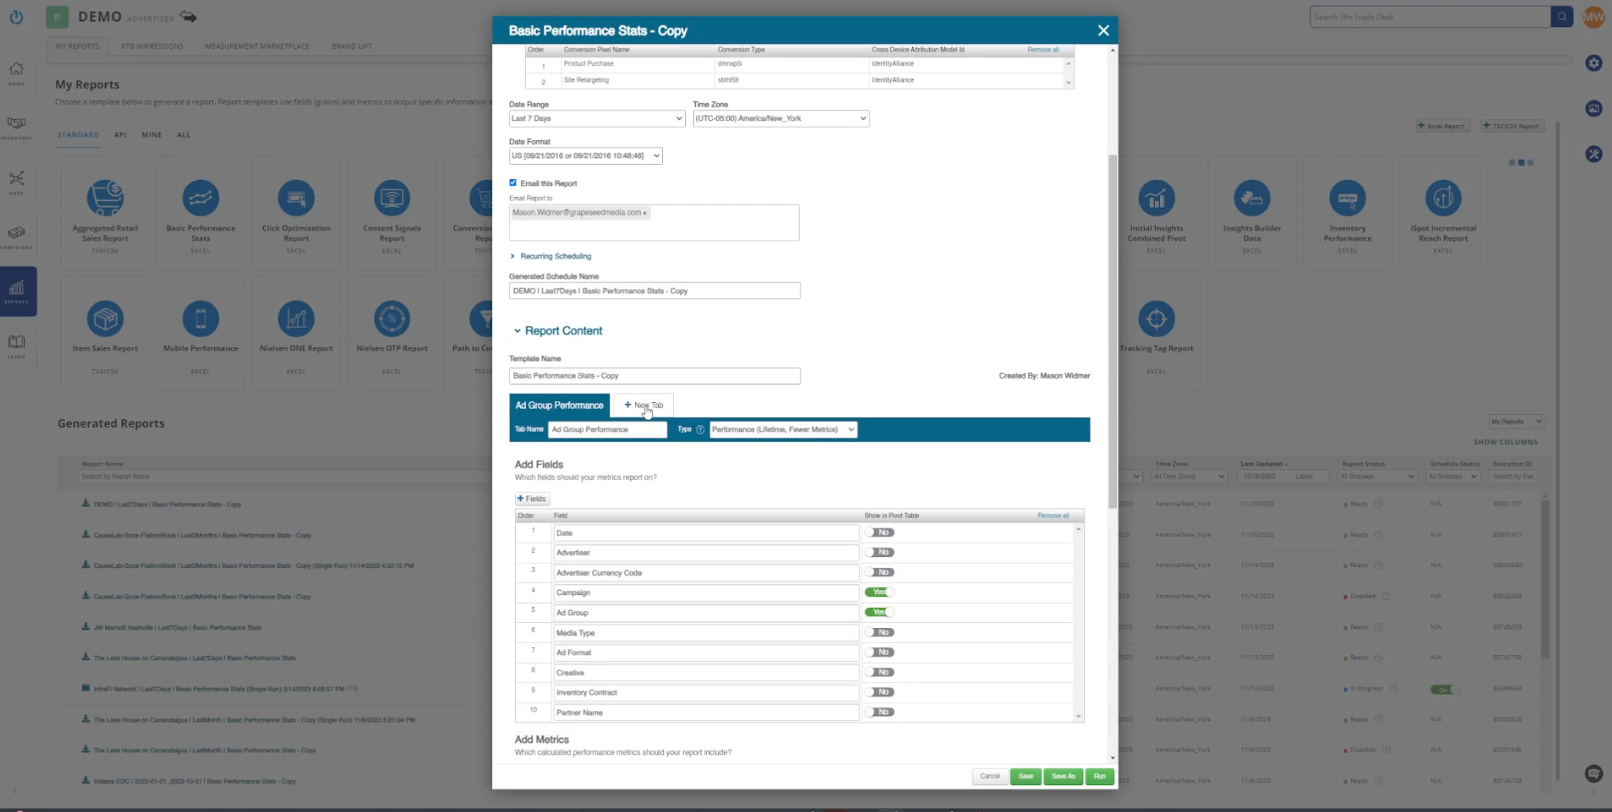
To finish setting up a geography tab, add fields. For example, If you want to know how each state (region) is performing:
- Select “Location & Geo” from the drop-down, then “Region.” You can also add “City” and ‘Metro” — metro is more granular than city.
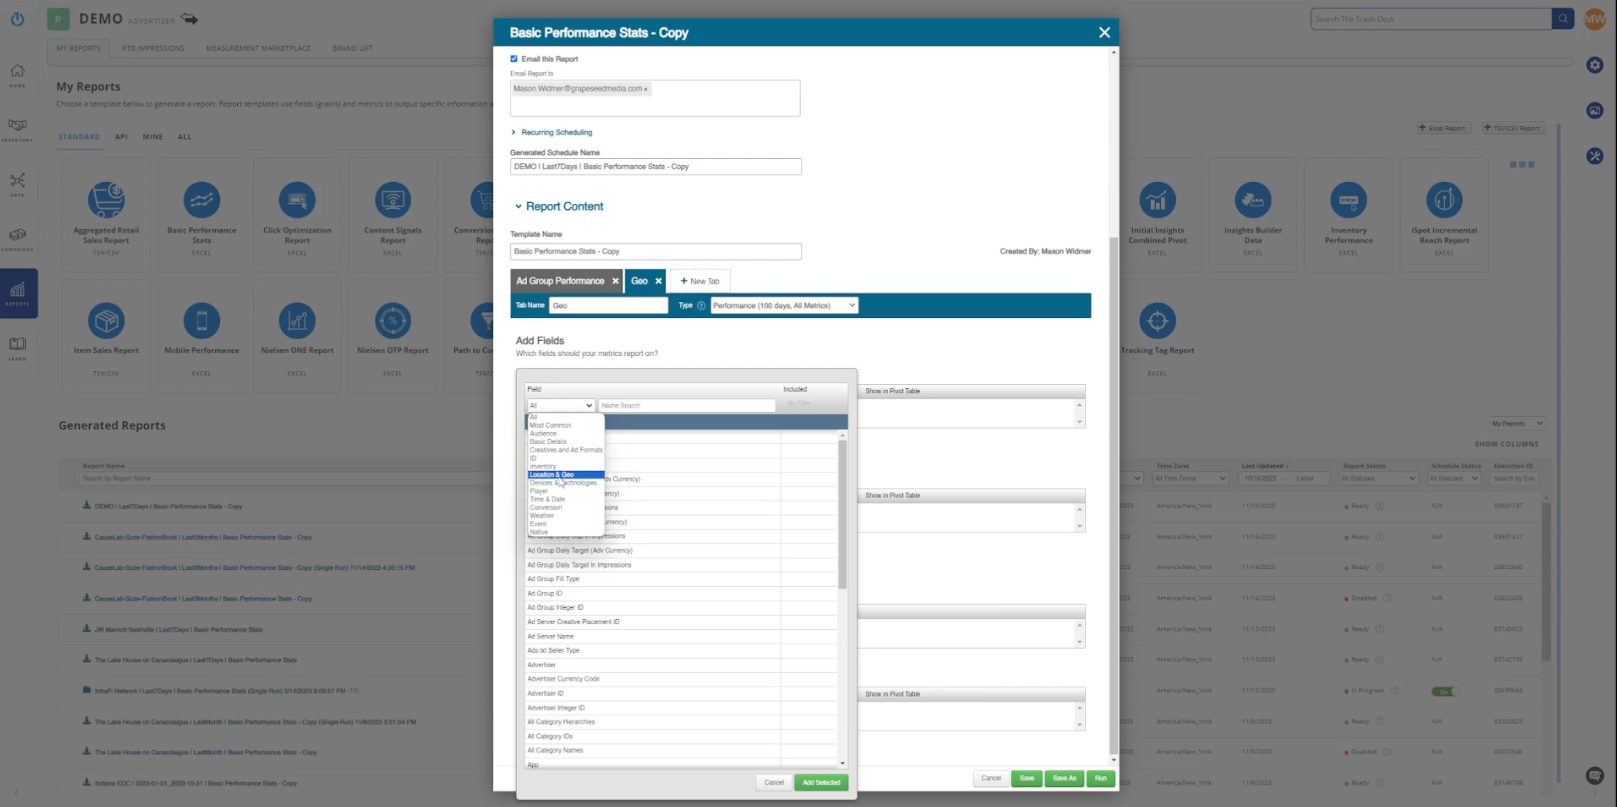
- Specify what you want to know about a region, for instance, impressions the region is getting, clicks, and advertiser CPM.
Repeat the process for inventory by creating a tab for inventory and specifying what you want to track. The field for inventory is labeled “Site.” You can also add “App” if you’re delivering ads on apps.
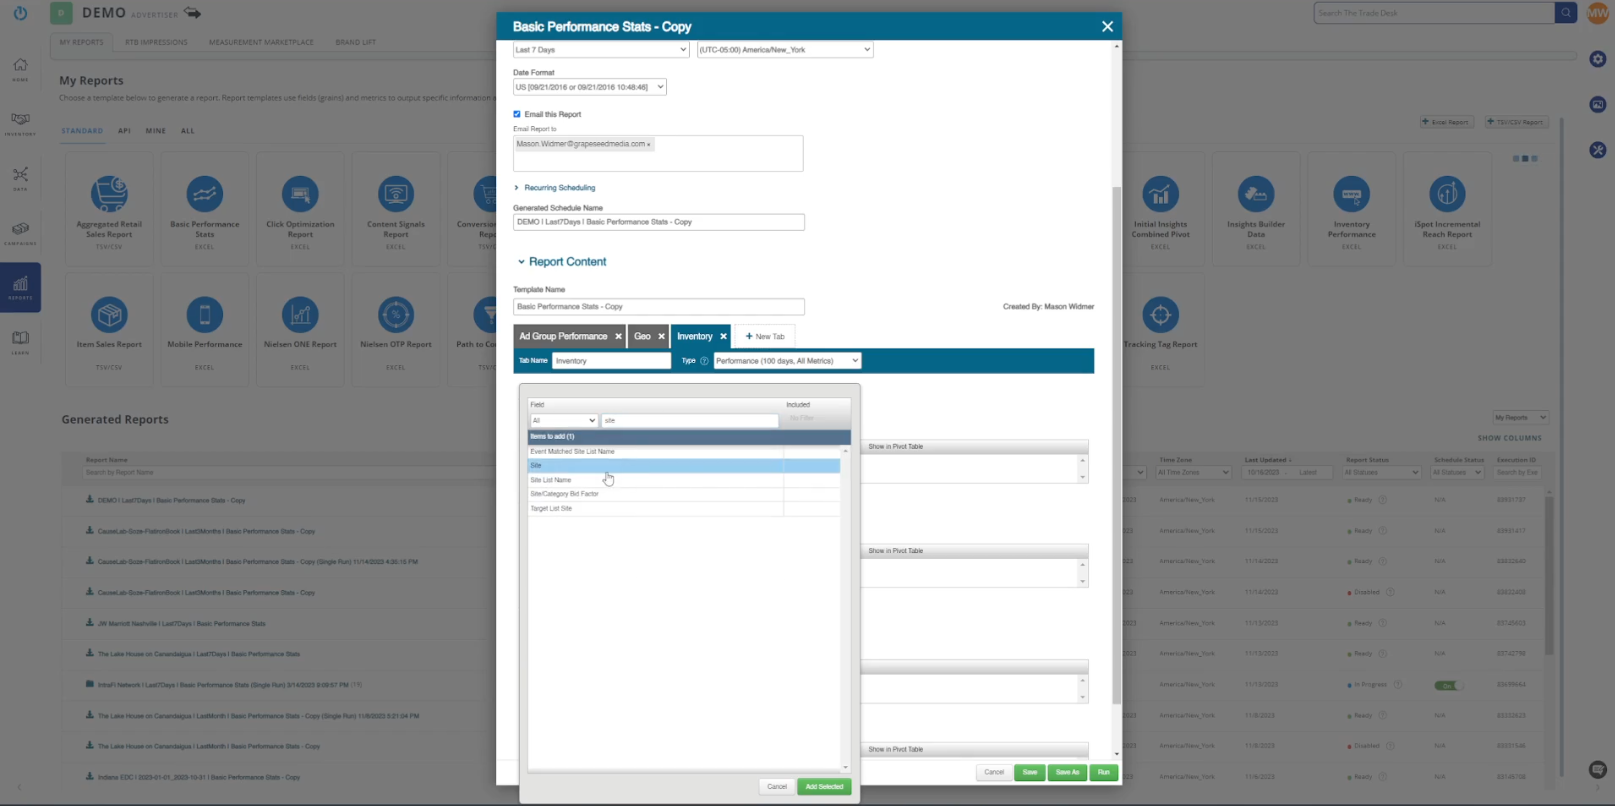
Once you have added your tabs, set up a schedule for your reports:
- Under ‘Date Range,” choose how often you want to receive the report. Let’s say you want the report to be recurring weekly, select “Last 7 Days,” then under “Recurring Scheduling,” you want to select “Schedule for recurring delivery,” “Weekly,” and the day you wish to receive the report.
- Save
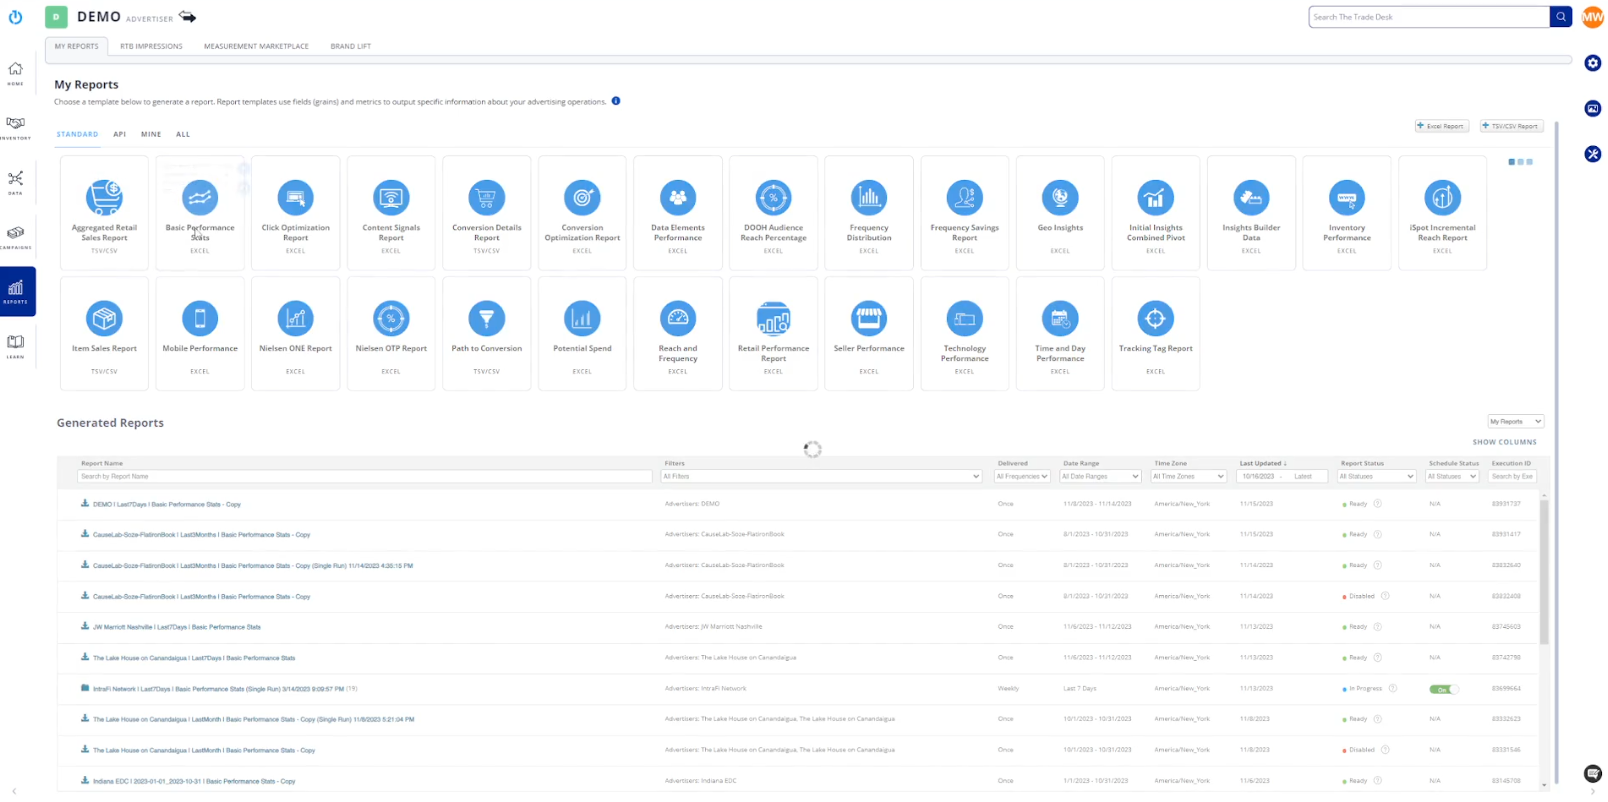
The reports will now come in every week and will be available under the Reports tab in “Generated Reports.”
Master The Trade Desk
The Trade Desk is a powerful platform known for its strong performance in several areas, including data-driven targeting, global reach, real-time bidding, and campaign optimization.
That said, the platform has some intricacies that can pose challenges for even the seasoned marketer. Navigating through its features and fully capitalizing on its capabilities requires a keen understanding of its nuances.
To help navigate this complexity and ensure success on The Trade Desk, consider partnering with Grapeseed Media. Our agency offers a wealth of expertise and strategic insights to help you create and execute effective campaigns, maximizing your advertising efforts on this platform.
Contact our team to explore the possibilities and unlock the full potential of your advertising efforts on The Trade Desk.