The Trade Desk is a demand-side platform that enables advertisers to set up, run, manage, and optimize advertising campaigns using programmatic technology.
According to The Trade Desk website, “Buyers can purchase ad inventory from many well-known exchanges and publishers, including Spotify, The New York Times, CNN, ESPN, Magnite, Foursquare, and others.”
Its features include advanced targeting options — such as contextual, geographical, and cross-device targeting — cross-channel advertising, data management, and integrations.
The object hierarchy within The Trade Desk is similar to what you’ll find in DV360 and has four levels:
- Partner
- Advertiser
- Campaign
- Ad group + Creative
In this tutorial, I’ll walk you through the steps to set up an ad campaign using The Trade Desk.
Step 1: Pre-Campaign Preparation
Before running any advertising campaign, it’s essential to define clear goals and establish what success will look like. For instance, do you want to raise brand awareness or consideration, drive more traffic to your website, or increase sales?
Answering these questions will help you identify your target audiences and the messages you want to reach them with — all essential elements of designing compelling ad creatives that will help achieve your goals.
Once you’ve established your audience and success metrics, it’s time to set up your campaign using The Trade Desk.
Step 2: Select the Advertiser You Want to Run the Campaign For
If you’re an agency working with multiple advertisers, the first step is to navigate to the correct advertiser that the campaign will be under.
There are two main ways to do this — you can either search for the advertiser in the search bar or click on the arrows in the navigation bar and select the advertiser from the drop-down menu.
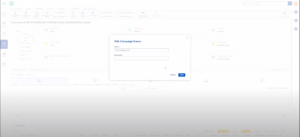
Step 3: Create a New Campaign
To create a new campaign, start by clicking on the megaphone icon at the top of the page. From there, you’ll be able to select from o
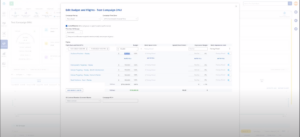
Next, you’ll be able to add your budget and dates, including:
- The total budget
- The pacing — this dictates how quickly the campaign will spend the budget while ensuring it doesn’t go over budget.
- The time zone — recommended best practice is to keep the time in Coordinated Universal Time (UTC) for dashboard and reporting purposes. If you have a campaign that ends at a specific time in a specific time zone, you can set that under “Start and End Dates (UTC),” where you’ll be able to convert UTC time to the time zone you want.
Next, you’ll need to select your KPIs and place them in order of importance — for example, in an awareness campaign, the most important KPI would be Reach. These KPIs will appear on the home screen to give you an overview of performance.
Then, it’s time to pick a seed audience, which helps guide the algorithm optimizations.
You can either select the seed audience from a list of audiences that The Trade Desk suggests based on previous campaigns or create a new seed audience.
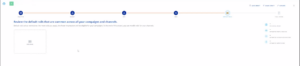
Next, it will ask you if there are any default rails that are common across all campaigns and channels.
This allows you to set any targeting parameter The Trade Desk offers that can remain static across everything you do in the campaign, such as geography or brand safety.
If you set any default rails, be sure to remember to change them later on if any aspects of your campaign change.
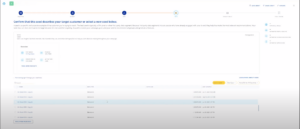
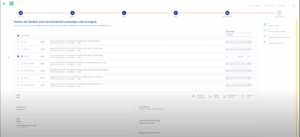
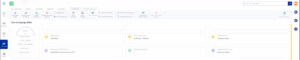
To finish setting up your campaign, review and finalize your recommended campaigns and strategies.
Here, The Trade Desk will offer to automatically generate several campaigns for you across different channels, including display, video, TV, audio, and out-of-home.
You can select one or more of these campaigns and allow The Trade Desk to generate them.
Once you’re happy with your selection, The Trade Desk will generate your selected campaigns and redirect you to the campaign dashboard.
After setting up a few campaigns, you won’t always need to build new campaigns from scratch — you can just create a template based on the current campaign structure.
Step 4: Edit Your Campaign
Once you’ve generated a campaign, you can edit it by clicking on the ‘Campaign’ tab in the left-hand navigation. This will bring up the campaign information that you can edit.
For example, you can change the campaign name by going to the top navigation bar, clicking ‘Manage Campaign Settings,’ and selecting ‘Edit name.’ This allows you to create a name that’s more user-friendly than the one automatically generated by The Trade Desk. You can also edit Partner fees and CPM fees.
Next, it’s a good idea to double-check your budget and flight dates by clicking on ‘Edit Budget and Flights.’
Here, you can turn on AutoAllocator, which allows you to ensure your campaigns have the potential to use the maximum budget spend but will not exceed the total budget cap.
If you turn off AutoAllocator, the campaign will spend the maximum budget for each campaign, which would surpass your total budget, so we don’t recommend using this option in most cases. By contrast, AutoAllocator enables the platform to allocate based on performance while preventing overspend.
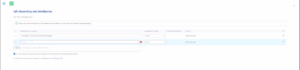
Under ‘Edit Reporting and Attribution,’ you’ll add in any pixels that are created and their priority order. The first pixel you choose is what The Trade Desk will automatically optimize the campaign toward.
Finally, you can manage frequency at the campaign level by selecting ‘Manage Frequency’ in the top navigation, as well as goals under ‘Manage Goals.’ You can also create templates, new ad groups, and more under the ‘Campaign’ tab.
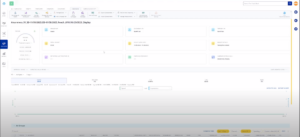
Once the campaign is up and running, you can see some high-level insights under the ‘Campaign Insights’ tab in the top navigation bar.
Step 5: Customize Your Campaign
If you don’t want to use the automated ad groups created by The Trade Desk, you can create your own under the ‘Campaign’ tab.
To add an audience, select an ad group and select ‘Audience’ under ‘Audience Predictor.’ You can apply audiences you’ve made or build your own audience based on first or third-party data. You can also choose whether you want to use The Trade Desk’s algorithm audiences or you can just target everyone.
You can also assign uploaded creatives, determine a specific frequency for the ad group, choose a geographical area to target, and add rails and optimizations such as time of day, language, or category.

Step 6: Analyze Your Campaigns
The Trade Desk provides various reporting and campaign management widgets, which you can access from the left-hand navigation bar, including:
- First-party data, such as pixels and total hits
- Third-party data, such as PMP options
- Inventory, where you can see first-party contracts (deals specific to your brand), and third-party contracts (deals available to everyone, plug-and-play options)
Unlock Your Advertising Potential with The Trade Desk and Grapeseed Media
Mastering The Trade Desk can open up a world of opportunities for your digital advertising campaigns. Armed with the knowledge from this tutorial, you’re well on your way to success.
However, should you ever encounter hurdles or wish to explore the full potential of your ad campaign, don’t hesitate to reach out to the Grapeseed team.
Contact us to get support from our team of programmatic experts who will help you maximize your advertising efforts.